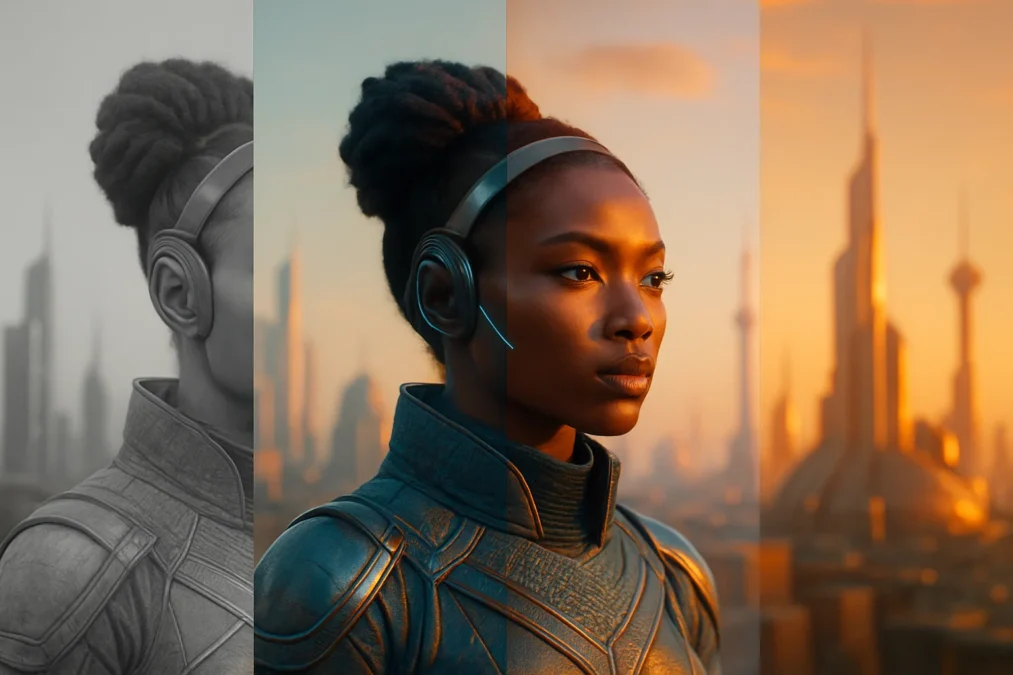
LUTs (Lookup Tables) are one of the most powerful and accessible tools a creator can use to elevate the visual look of their content. Whether you’re a musician creating a music video, a content creator posting to YouTube, or a filmmaker capturing behind-the-scenes moments—LUTs can take your raw footage from average to cinematic with just a few clicks.
Let’s break down what LUTs are, why they matter, and how to actually use them in your creative workflow.
What Is a LUT?
A LUT (Lookup Table) is a digital file that adjusts the color and tone of your video or image. Think of it like a filter—but one designed by colorists to achieve consistent, high-quality results across different clips and cameras.
There are different types of LUTs:
- Correction LUTs: Used to normalize footage from flat or LOG color profiles.
- Creative LUTs: Add a stylistic grade or cinematic feel.
- Conversion LUTs: Match footage between different cameras or color spaces.
Why LUTs Matter for Artists and Creators
- Consistent Branding: LUTs help you create a visual identity that fans recognize.
- Time Saver: Instead of grading from scratch, apply a LUT and tweak from there.
- Professional Look: Instantly elevate production quality without hiring a full-time colorist.
- Social Ready: Use different LUTs for YouTube, Instagram, TikTok to set the right tone and mood.
How to Use LUTs in Your Workflow
Step 1: Choose the Right LUT
Pick a LUT that fits the mood of your content. Need warmth and nostalgia? Look for “film” or “vintage” LUTs. Want clean and modern? Go for high-contrast or teal-orange palettes.
Track Blazers will soon offer downloadable LUT packs tailored for:
- Music videos
- Reels & short-form content
- Behind-the-scenes footage
Step 2: Apply the LUT
Depending on your software:
- Adobe Premiere Pro: Use Lumetri Color → Input LUT
- Final Cut Pro: Use the Custom LUT effect
- DaVinci Resolve: Add LUT in the Color page → LUTs panel
- CapCut/Mobile Apps: Import as a filter or custom effect
Step 3: Fine-Tune
LUTs are a starting point, not a finished product. Adjust:
- Exposure
- Contrast
- Saturation
- Skin tones
Every camera and lighting setup is different, so make sure the LUT complements—not overwhelms—your footage.
Where to Get Quality LUTs
Here’s where you can source great LUTs:
- Track Blazers LUT Packs (coming soon!)
- Color Grading Central
- Lutify.me
- Free LUTs from creators on YouTube
Pro tip: Build your own LUTs after creating a signature look, and apply it across your whole brand.
Final Takeaway
In a visual-first world, how your content looks is just as important as how it sounds. LUTs are one of the easiest ways to consistently elevate your video quality, reinforce your brand, and save time on editing.
Start small, test a few LUTs, and watch your content come to life with richer colors, deeper emotion, and a look that stands out in the scroll.
How to Install & Use LUTs:
- Choose your LUT: Pick the LUT that matches your project’s emotion or visual style.
- Open your editor: Launch your preferred software (e.g., Premiere Pro, Final Cut Pro, DaVinci Resolve, CapCut).
- Locate the LUT panel: This is usually found under “Color” or “Effects” settings.
- Apply the LUT: Browse to the downloaded
.cubefile and load it. - Tweak the look: Adjust exposure, saturation, white balance, and skin tones for a polished result.
Included LUT Styles:
- Cinematic Teal & Orange: Bold and punchy—ideal for music videos or dramatic scenes.
- Warm Film Tone: Rich and nostalgic—great for storytelling and lifestyle content.
- Clean Natural Look: Neutral and bright—perfect for vlogs or behind-the-scenes.
- High Contrast B&W: Stylish and stark—for interviews or retro vibes.
- Soft Pastel Grade: Gentle and moody—ideal for romantic or dreamy footage.
Tips for Best Results:
- Always shoot with good lighting and proper exposure.
- Don’t overdo it—LUTs should enhance, not overpower your footage.
- Keep a consistent look across all videos for brand recognition.
Need more help? Join the Track Blazers community or reach out for personalized support:
📍 https://app.trackblazers.net
What’s Next?
Visual quality is one piece of the puzzle—but how do you make sure your visuals are actually working for you?
In our next post, we’ll show you how to build a visual identity kit : a go-to set of colors, fonts, LUTs, and templates that make every post feel like your brand.


